Making Light of a Dark Situation
Parties, concerts, dance recitals… – these are just a few examples of where you may encounter the photographer’s nightmare – darkness. But there’s no need to be afraid – at least of high ISO anyways. Here’s an in depth look at how I use relatively high ISO to get images I’m happy with.
Now, when I say high ISO, for me, it’s about 3200 or 4000 on my Canon 6D. Depending on your camera, you may be able to go MUCH higher than that (much, much more so if you have the king of ISO, Sony A7S), or you may notice your images fall apart at an ISO lower than that. By experimentation, you’ll find your sweet spot, ISO “go to” for these low light situations.
What Is ISO Anyhow?
ISO measures the sensitivity of your camera’s sensor to light. When it is increased, I’m increasing the camera sensor’s sensitivity to light. In well lit situations or broad daylight, I’ll probably have my ISO set as low as it goes. But when the night comes creeping in, I’ll have to set phasers to stun and crank up the ISO.
Balancing ISO with Shutter Speed, Aperture and Flash
ISO is what I will modify after I’ve settled on a shutter speed and aperture I want for my photos. I’ll just leave it at 100 (my camera’s lowest ISO setting) until I have a need to increase it. The reason I change my ISO after I’ve set my shutter speed and aperture, is ISO usually affects my images less noticeably (up to a certain point) than shutter speed and aperture. A faster shutter speed will freeze more action as it is raised (and vice versa) and changing the aperture results in a larger or smaller depth of field, meaning, a larger or smaller area will be in focus during your shot. Increasing shutter speed and aperture will result in less light making it to your cameras sensor, so to compensate, you may need to increase your camera’s sensitivity to light also known as its ISO. This is making the most of a little light! As you take photos in particular scenarios and situations, over time, you’ll know where you’ll want your shutter speed, aperture, and ISO to capture the scene before you in an exposure and image the way you’d like. If you have the ability to add flash, this will help illuminate your subject, but depending on your situation, you may consider it more beneficial to increase your ISO, or using high ISO in conjunction with some flash. To learn more about how shutter speed, aperture, and ISO affect each other and light, here is a great explanation on what’s known as the Exposure Triangle.
Common Misconception – High ISO MUST Be Avoided
High ISO must be avoided because it results in terrible, noisy images. I say this statement is false and should be changed to, use ISO to adapt to your surroundings and situation. When the ambient light is low, the answer isn’t always to add more flash. The reason for this, is ISO helps increase the overall brightness of your entire image; your subject as well as the background, whereas flash illuminates what it is aimed toward.
Uses for High ISO
I use high ISO a lot for indoor events. If it’s low light, I may bump it up as far as 4000. For me this is fine, but it’s subjective – you may look at your images and see the grain is unacceptable. This may not give me a lot of flexibility as far as cropping in editing, because I know it will be a grainy image. But this allows me to have a brighter image overall and not have to push my speedlites so hard, which allows me to trigger them more frequently, giving me the ability more images in quick succession and also makes their batteries last longer. I also use a small amount of noise reduction in Adobe Lightroom to help alleviate the amount of grain. Also, my Canon 6D’s sensor does well handling low light and doesn’t produce as much noise relative to my Canon 70D.
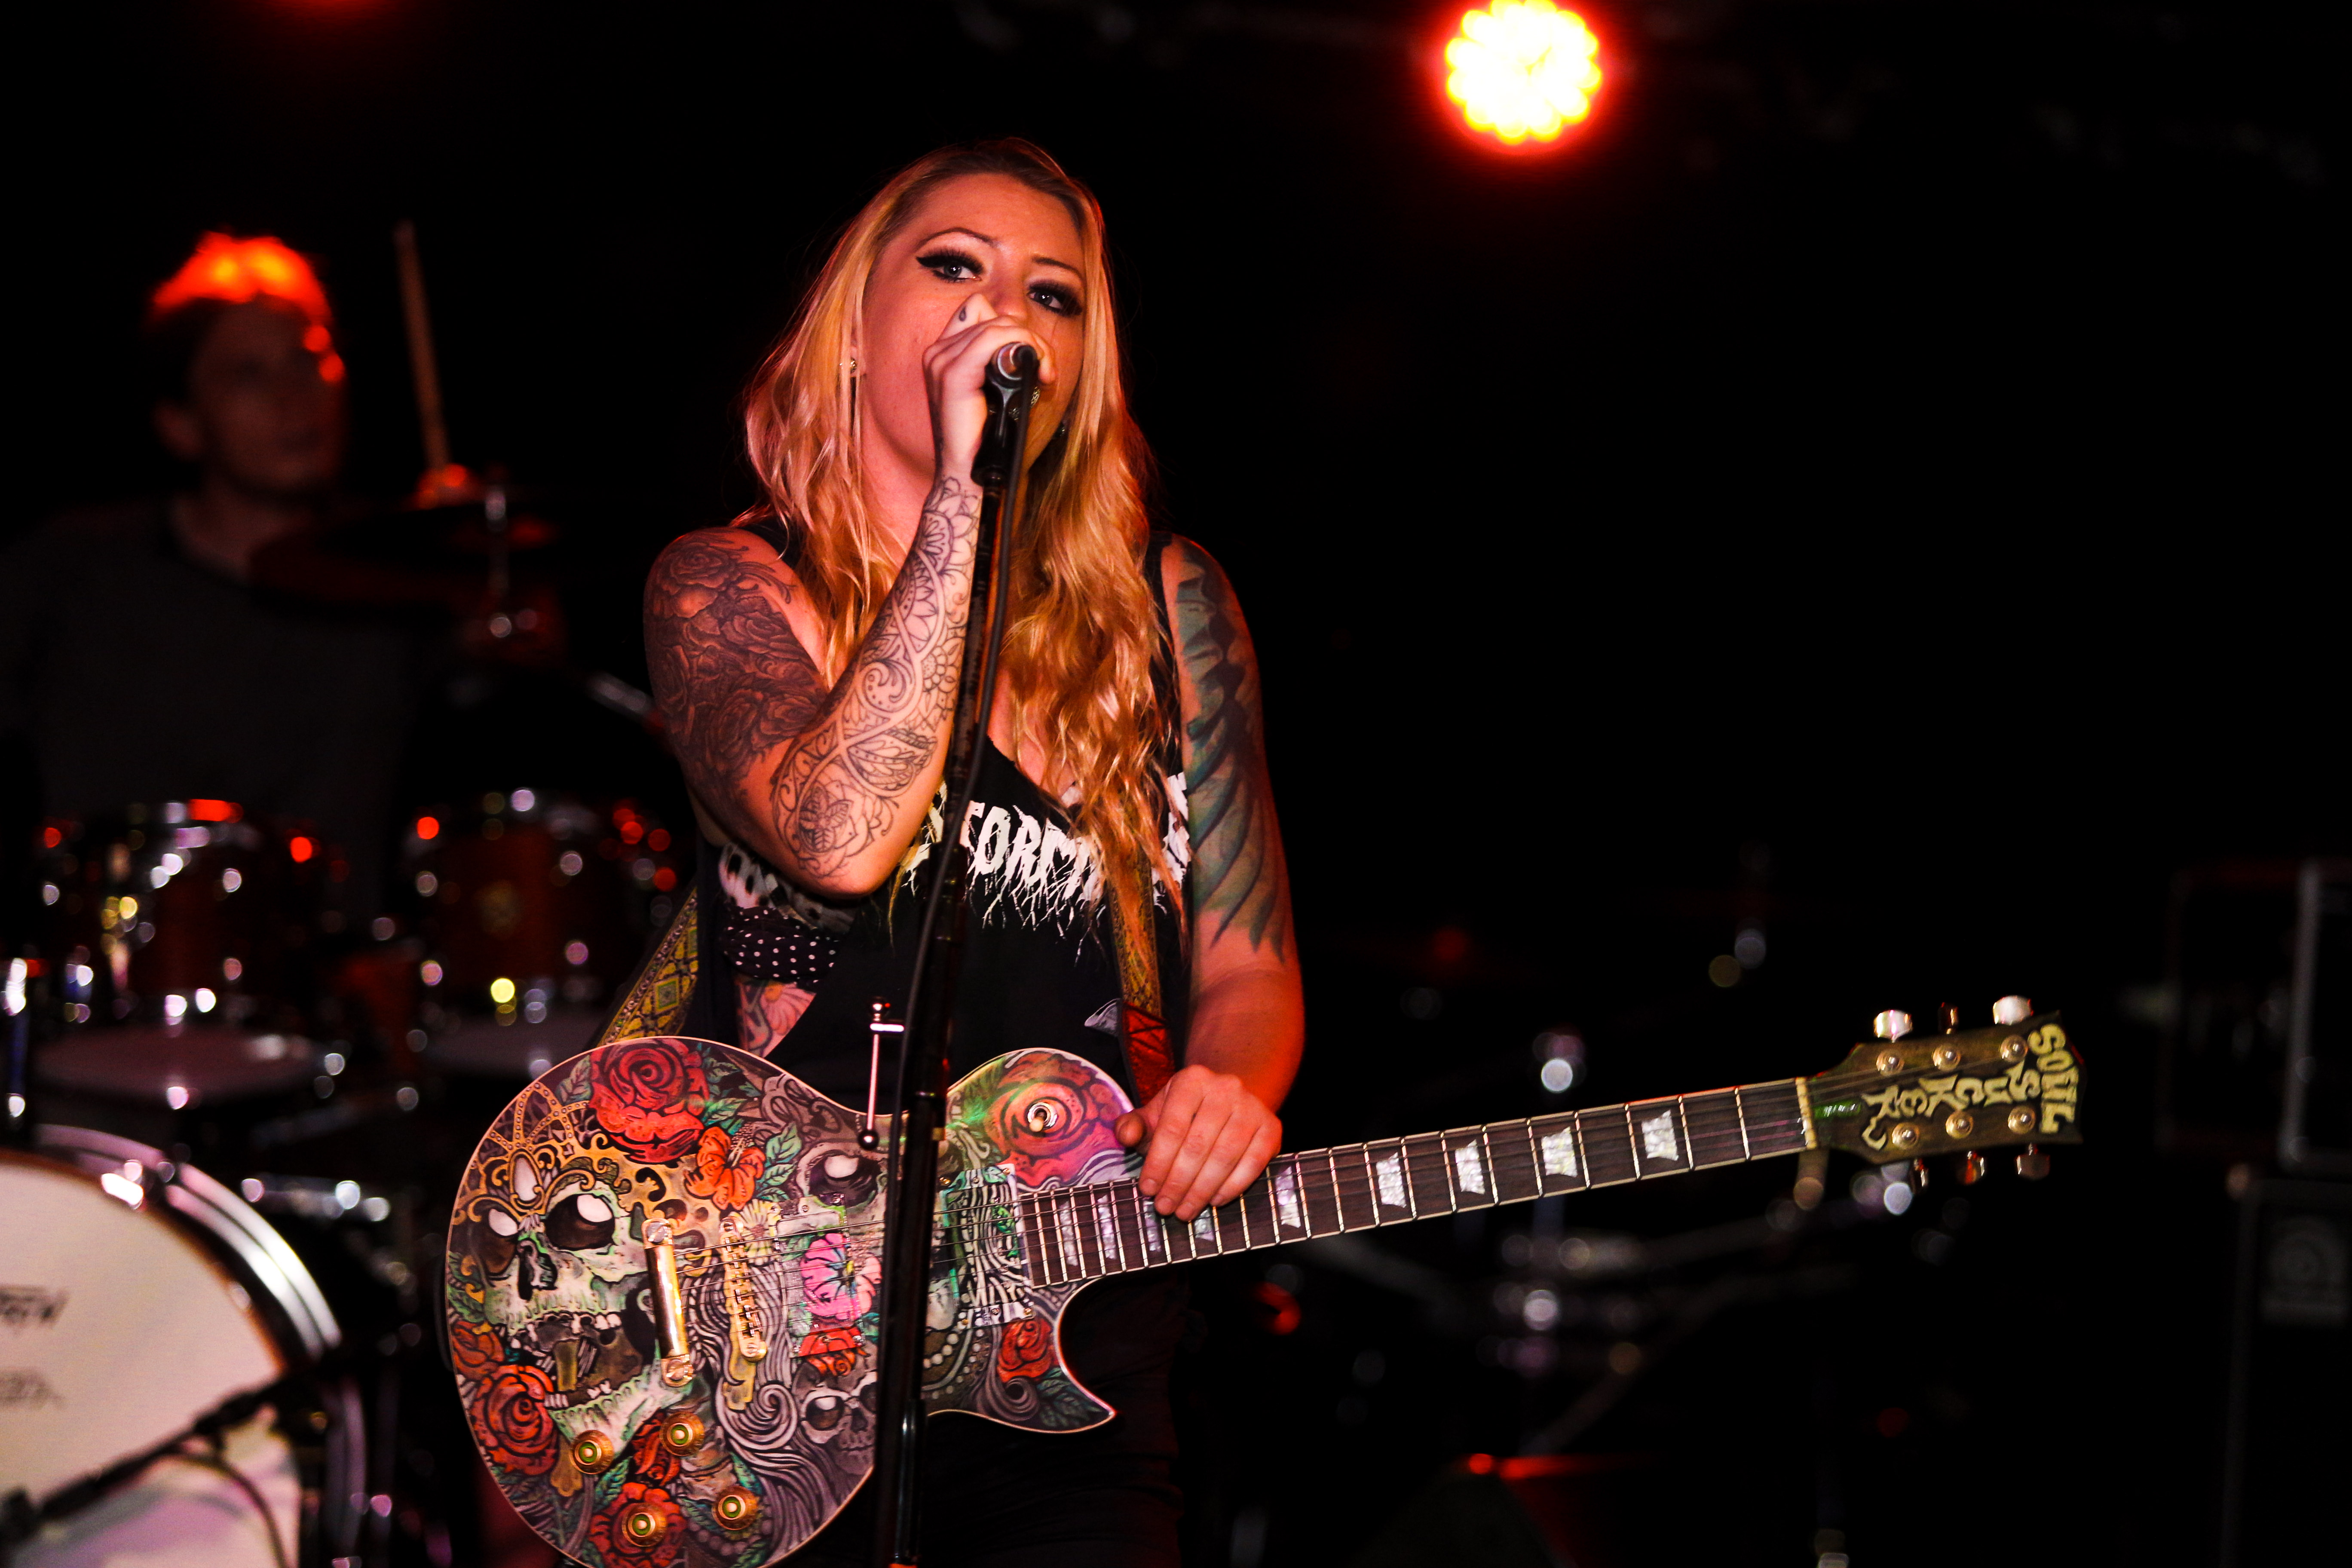
Here’s an example of a recent event I shot and I balanced having a bit of flash with high ISO:

Example of leveraging high ISO – settings ISO 3200, f2.8, shutter speed 1/160,
Here’s my general Noise Reduction settings to offset unwanted Noise that may result from low light environments.
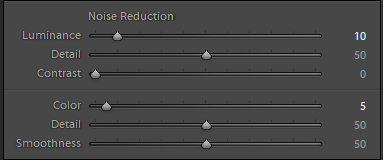
Noise Reduction settings in Lightroom to compensate for subtle noise in image.
Here’s an event from a while ago I shot using low ISO and significant flash:
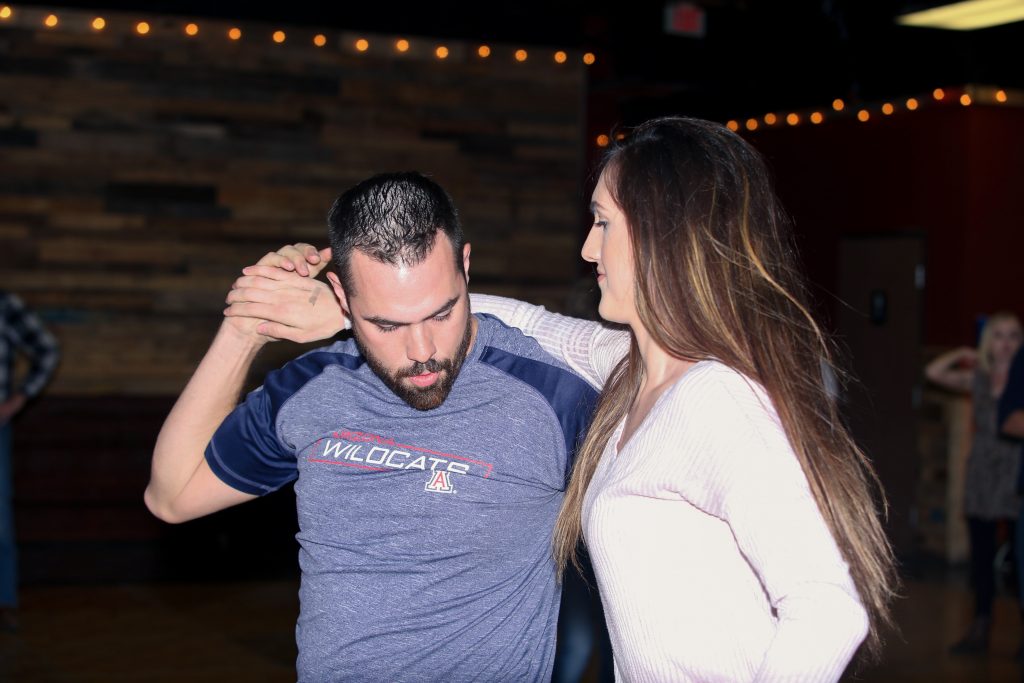
Low ISO (ISO 320) and high flash resulted in my subjects being very well lit, but my background is very dark and lacks a lot of detail. There’s also a bit of shadow casted underneath the right arm of the man and we lost some detail in the woman’s white shirt!
Key to Using High ISO Properly
An important note for using high ISO is your image still needs to be exposed as closely to how you want it appear. If you’re using high ISO, and your image is still very dark, you probably won’t be able to save it in editing, and it will have a lot of noise. High ISO makes a little light work more efficiently, but don’t take a dark image with high ISO expecting to be able to brighten it 3+ stops in editing without noticing significant digital artifacts in your image.
A Low Light Example Where I Wouldn’t Use High ISO
One example of when I’d choose not to use high ISO is when I use a tripod and my subjects are extremely still. Instead of using high ISO, which does add more and more grain to the image as its increased, I’ll use a slower shutter speed. A good example is real estate photography. I’ll place the camera on a tripod to eliminate any movement from myself holding the camera, and since there’s no moving subjects I intend to be in the image. I can use a slow shutter speed to allow my camera’s sensor to soak in light from its surroundings over time.
Conclusion
High ISO works as a great overall image boost, and when used properly, will allow you to rely less on bright flashes and make more efficient use of existing ambient light, or make better use of a little light from your flashes. Overall, this will result in brighter, better quality images, being able to take more images, and making more efficient use of speedlites.
Did this give you any ideas to try shooting your next event? Have any additional tips, tricks, suggestions or ideas? Let me know in the comments!
August 21, 2018